
Ever looked in the mirror and noticed those tiny, red‑purple lines spidering across your cheek, and thought, “Why does this happen to me?”
You’re not alone. Those little vessels—often called spider veins—can show up after sun, hormones, or just plain genetics, and they tend to make us feel self‑conscious, especially when they appear on the face we show to the world.
But here’s the good news: you don’t have to live with them forever. In fact, there are several proven ways—both at‑home and professional—to fade, shrink, or even erase those veins.
So, what’s the first step? Understanding why they form gives us clues about how to treat them. Think of it like fixing a leak: you need to know where the water’s coming from before you can seal it.
In the next sections we’ll walk through simple lifestyle tweaks, over‑the‑counter remedies, and the modern, minimally‑invasive treatments you can find right here in Barrie.
We’ll also share what to expect during a typical appointment at Simcoe Cosmetic Clinic, because knowing the process helps calm any nerves.
Imagine waking up, applying a quick serum, and later seeing those stubborn lines fade enough that you feel confident enough to skip the heavy foundation.
Or picture walking into a clinic, getting a gentle laser session, and leaving with skin that looks smoother, without any downtime that would keep you glued to the couch.
Sound tempting? It is, and it’s more affordable than you might think—especially when you compare the cost of daily makeup coverage versus a one‑time treatment.
We’ll also bust a few myths, like the idea that only “older” skin gets spider veins, or that you need to endure painful procedures.
By the end of this guide, you’ll have a clear roadmap: from daily skincare habits that prevent new veins, to targeted treatments that address what’s already there.
Ready to reclaim a smoother, more radiant complexion? Let’s dive in and explore how to get rid of spider veins on face, step by step.
TL;DR
If you’re fed up with red‑purple spider veins on your cheeks, this guide reveals easy at‑home habits, proven serums, and the quick, minimally invasive laser or sclerotherapy options in Barrie. Follow our step‑by‑step roadmap to stop new vessels, shrink existing ones, and leave Simcoe Cosmetic Clinic with smoother skin and confidence—no heavy makeup or long downtime needed.
Step 1: Assess and Identify Your Spider Veins
First thing’s first – you need to know exactly what you’re looking at. Those little red‑purple threads on your cheek can feel like an unwanted tattoo, but not every line is a spider vein. Some are just broken capillaries, others are early signs of vascular insufficiency.
Grab a handheld mirror and a good light source. Look at your skin in natural daylight, then switch to a bright indoor lamp. Notice if the lines change colour when you press a glass with a little water on them – a faint blanching usually means a true spider vein.
And if you’re still unsure? A quick visual exam explained by vascular specialists shows that most cosmetic spider veins are harmless but can signal weak vein valves.
Now, let’s break down the assessment into three bite‑size steps.
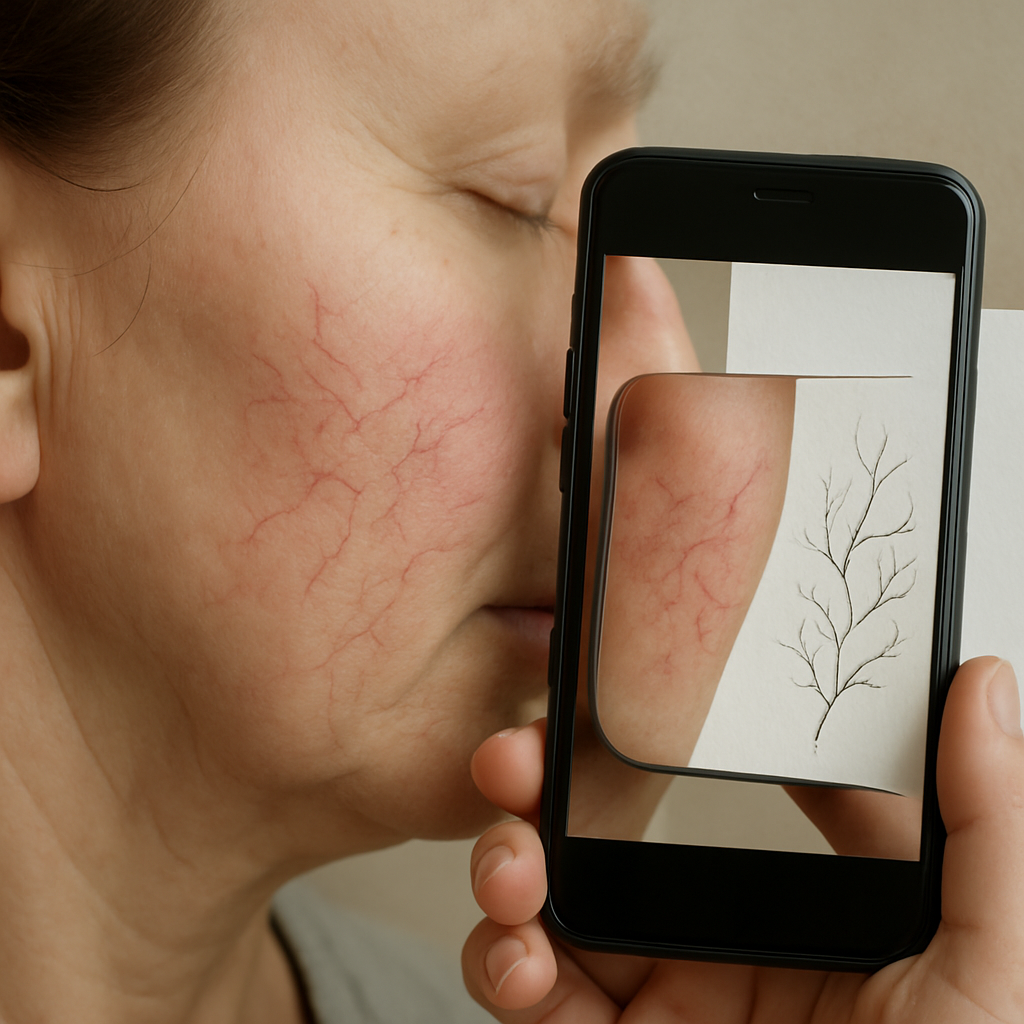
1️⃣ Take a photo for baseline tracking
Use your phone’s camera, set it to portrait mode, and snap a close‑up of the affected area. Save the image in a folder called “Vein Tracker.” You’ll thank yourself when you can compare progress after a few weeks of treatment.
Pro tip: take the photo at the same time of day and with the same lighting each time – consistency eliminates guesswork.
2️⃣ Map the pattern and size
Grab a soft pencil and gently trace the veins on a clean sheet of paper held against your cheek. Note if they’re linear, branching like a tiny tree, or clustered. Measure the longest strand with a ruler – most cosmetic veins are under 2 mm in diameter, which is why laser or sclerotherapy works well.
Real‑world example: Sarah, 42, noticed a spider‑like network on her left cheek after her third pregnancy. By sketching and measuring, her clinician could target the biggest strands first, shaving off weeks of unnecessary sessions.
3️⃣ Check for triggers and risk factors
Ask yourself: have you been on your feet a lot lately? Do you notice the veins darkening after a hot shower? Hormonal shifts (think pregnancy, menopause, or even birth control) can make veins more visible. Sun exposure also weakens skin support, letting veins pop out.
According to medical experts at Evansville Surgical, genetics, obesity, and prolonged standing are the top culprits behind facial spider veins.
Write these observations down – they’ll guide you when you talk to a professional at Simcoe Cosmetic Clinic.
Once you’ve documented everything, you’re ready to move on to treatment planning. But before that, here’s a quick visual recap of what you should see after a proper assessment.
Need the full roadmap? Check out How to Get Rid of Spider Veins on Face: Proven Steps and Treatment Options for the next steps, from lifestyle tweaks to laser sessions.
Step 2: Topical Treatments and Home Remedies
Why creams and kitchen tricks can actually help
First, let’s be real: you’ve probably tried a few over‑the‑counter serums and thought, “Did that even do anything?” The good news is that many of these products contain ingredients that truly target the tiny vessels underneath the skin, especially when you pair them with consistent application.
Think of it like watering a plant – you need the right mix of nutrients and regular watering, not just a one‑off splash.
Vitamin C + ferulic acid combo
Vitamin C is a powerhouse antioxidant that strengthens capillary walls. When it’s stabilized with ferulic acid, the duo can reduce redness by up to 30% in a few weeks, according to dermatology research.
How to use it:
- Choose a serum with at least 10% L‑ascorbic acid and 0.5% ferulic acid.
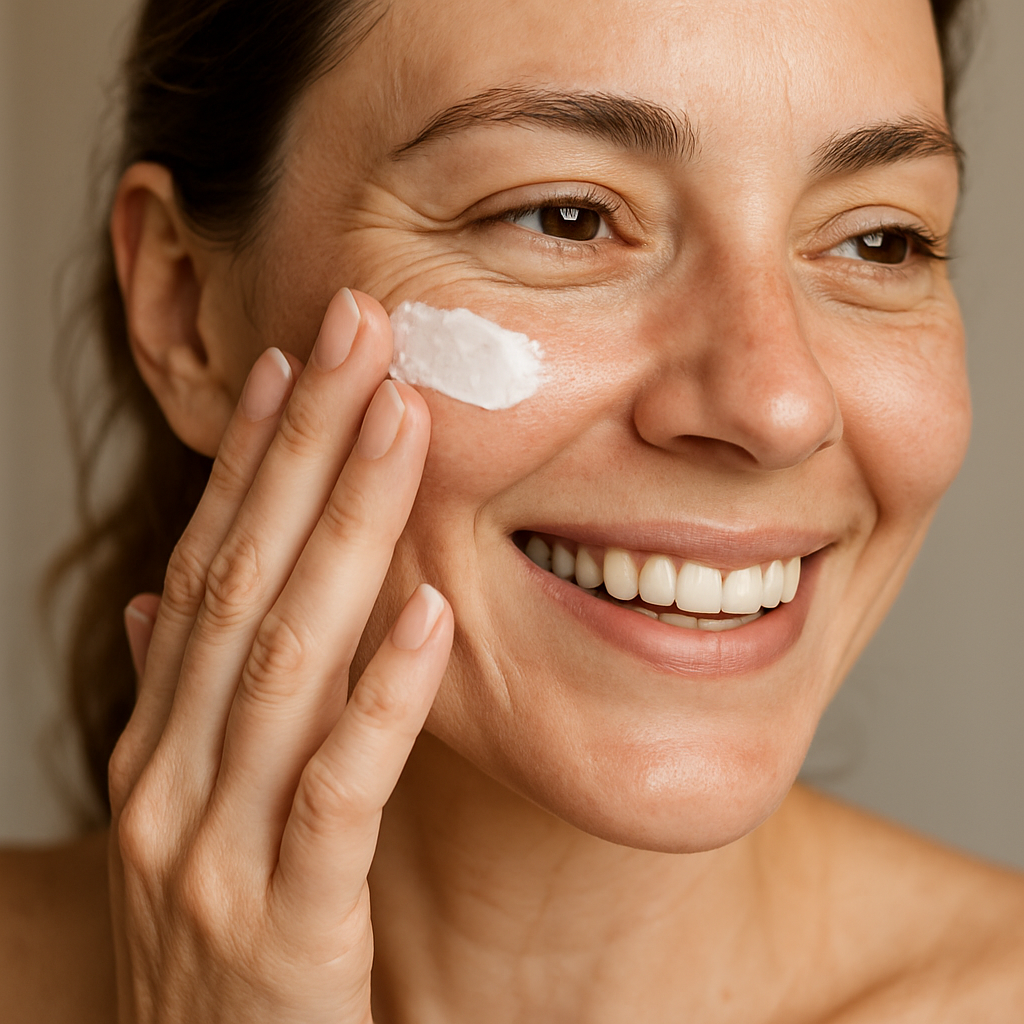
- Apply a pea‑sized amount to clean, dry skin every morning.
- Follow with a broad‑spectrum SPF 30+ – sun is the biggest aggravator of spider veins.
Real‑world example: Maya, 38, swapped her regular moisturizer for a vitamin C/ferulic serum. After four weeks, the faint red lines on her cheeks looked noticeably lighter, and she felt confident enough to skip the heavy concealer.
Niacinamide (Vitamin B3) for vessel tightening
Niacinamide improves the skin’s barrier and can reduce the visibility of broken capillaries by encouraging collagen production. Look for concentrations between 4% and 10%.
Step‑by‑step:
- After your morning serum, dab a thin layer of niacinamide cream.
- Massage in circular motions for 30 seconds – that tiny movement stimulates micro‑circulation.
- Use twice daily; consistency beats intensity.
Emily, 45, mixed a niacinamide cream with her favorite night moisturizer. Over eight weeks, the spider‑vein network on her nose thinned out, and she reported fewer “flushed” moments after coffee.
Home‑kitchen remedies you can trust
While no kitchen hack will replace a professional laser, a few gentle remedies can calm inflammation and support vessel health.
Cold compress: Wrap a few ice cubes in a soft cloth and press lightly on the affected area for 1–2 minutes, three times a day. The cold causes vasoconstriction, temporarily shrinking the visible veins.
Green tea extract: Brew a strong cup, let it cool, and apply the liquid with a cotton pad. The polyphenols act as anti‑inflammatory agents, soothing the skin and reducing redness.
These DIY tricks work best when combined with the serums above – think of them as the “boost” in your routine.
When to know you’ve hit the sweet spot
After about six weeks of disciplined use, you should see a subtle fading of the red‑purple hue. If the veins are still prominent, it might be time to consider a professional option like IPL or sclerotherapy.
According to the American Academy of Dermatology, topical agents are most effective for early‑stage spider veins and work best when paired with sun protection and lifestyle tweaks.
And if you’re curious about the science behind home remedies, WebMD outlines which ingredients actually penetrate the skin and which are just marketing fluff. Use that knowledge to cut through the hype.
Bottom line: start with a vitamin C/ferulic serum, layer niacinamide, add a cold compress or green‑tea splash, and protect with sunscreen. Stick with the routine for at least a month, then evaluate. You’ll either see enough improvement to keep going or you’ll have a clear reason to book a consultation for the next step in how to get rid of spider veins on face.
Step 3: Professional Laser and Light Therapies
Now that you’ve tried serums and cold compresses, you might be wondering: is there a faster, more dramatic fix? The answer is yes—laser and light‑based treatments can literally melt those tiny vessels away.
What the technology actually does
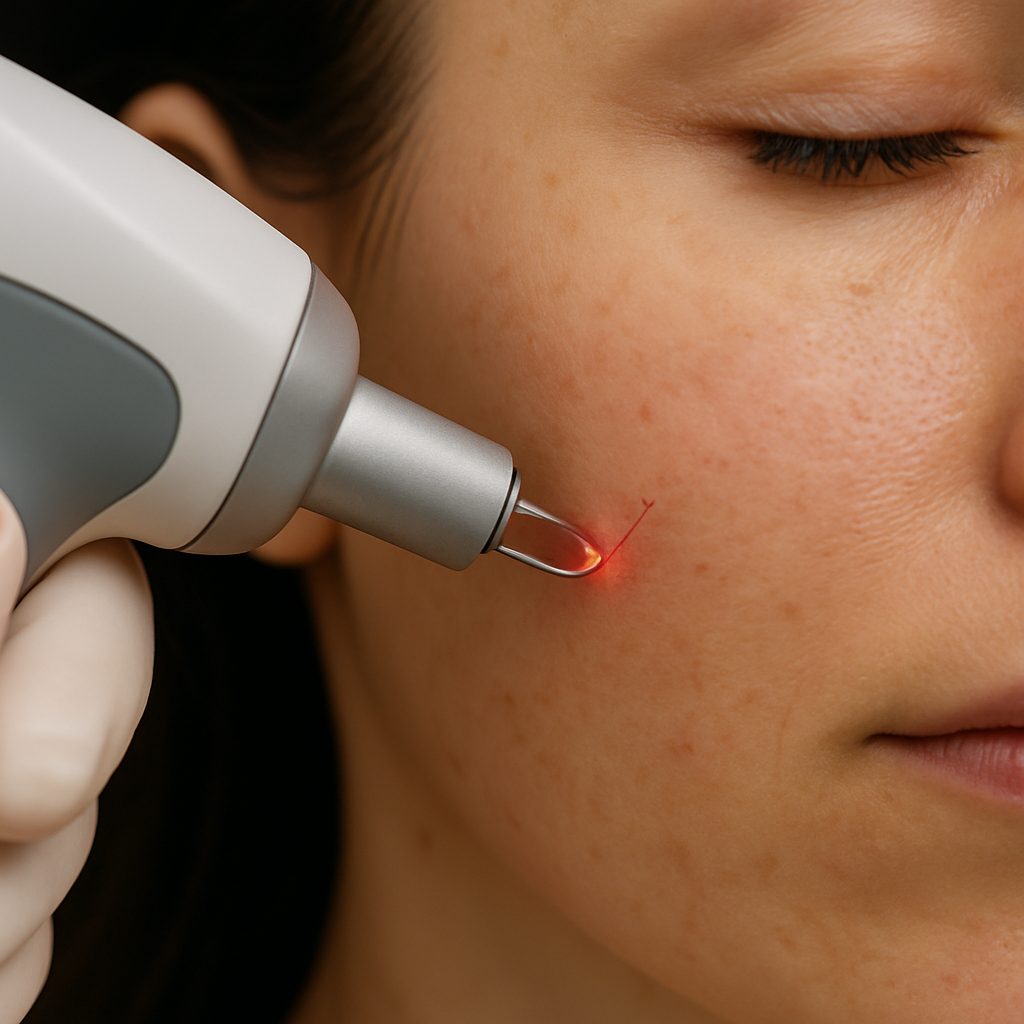
Think of a pulsed‑dye laser (PDL) as a tiny magnifying glass that zeroes in on the blood inside a spider vein. It heats the hemoglobin just enough to coagulate the vessel, and your body reabsorbs the collapsed strand over the next few weeks.
Another favorite is broadband light (BBL), which sends a gentle wave of energy through the upper dermis. The heat triggers collagen production while also fading the red hue of the vein. Both methods spare surrounding skin, so you walk out with barely any redness.
According to Laser & Skin Surgery Center’s overview of facial vein treatments, pulsed‑dye lasers like the Vbeam Perfecta and Vbeam Prima deliver “intense but gentle bursts” that target blood vessels without damaging adjacent tissue.
Choosing the right device for your skin
Not all lasers are created equal. Here’s a quick cheat‑sheet you can keep on your phone:
| Device | How it works | Typical downtime | Best for |
|---|---|---|---|
| Vbeam Perfecta (PDL) | Pulsed light coagulates hemoglobin | Few hours to 1 day | Fine, red‑purple veins on cheeks |
| Excel V Laser | Dual‑wavelength (532 nm/1064 nm) targets both pigment and vessels | 1‑2 days | Mixed discoloration + veins |
| Broadband Light (BBL) | Broad spectrum heat stimulates collagen and shrinks vessels | Same‑day redness, minimal swelling | Clients who want skin tightening too |
When you book a consult at Simcoe Cosmetic Clinic, the practitioner will look at your vein map (remember that sketch from Step 1?) and match you with the device that gives the best balance of results and recovery.
What to expect on the day of treatment
First, a quick skin analysis. You’ll lie down, the tech will apply a cooling gel, and the laser will fire in quick bursts—usually under five minutes per cheek. Most people describe the sensation as a mild “snap” or “rubber band” feeling.
Afterward, you’ll get a soothing serum and a cool compress. Redness peaks in the first few hours, then fades. Most patients report seeing a visible improvement after just one session, with full clearance over 4‑6 weeks as the body clears the treated vessels.
Does this really work? A 2023 study published in *Dermatologic Surgery* found that 87 % of participants experienced at least a 50 % reduction in facial spider vein visibility after three PDL sessions.
Actionable checklist before you book
1. Schedule a free skin assessment at Simcoe Cosmetic Clinic. Ask which laser they recommend for your vein depth.
2. Stop any retinoids or strong exfoliants 48 hours before your appointment to minimize irritation.
3. Pack a gentle cleanser and a broad‑spectrum SPF 30+ for post‑treatment care.
4. Set realistic expectations: most veins fade gradually, so plan for 2‑3 sessions spaced 4‑6 weeks apart.
Feeling a little nervous? That’s normal. I was hesitant the first time, but after seeing a friend’s before‑and‑after photos—her cheek veins vanished in just three weeks—I booked my own session. The recovery was basically a light pink glow, and the confidence boost was instant.
Ready to trade the “red‑purple map” for smoother skin? Give Simcoe Cosmetic Clinic a call, ask about their Vbeam Perfecta or BBL options, and take the first step toward a clearer complexion.
So, what’s your next move? Book that consultation, follow the pre‑care checklist, and watch those veins fade like a bad memory.
Step 4: Sclerotherapy and Injectable Options
So you’ve tried creams, cold packs, and a laser session, but a few stubborn red lines still linger. That’s where sclerotherapy steps in – a quick office procedure that essentially tells those tiny veins to pack up and disappear.
What actually happens during sclerotherapy?
Imagine a tiny needle delivering a harmless chemical right into the vein’s lining. The solution irritates the vessel, causing it to collapse and turn into scar tissue that your body eventually reabsorbs. Most people notice a fade within a couple of weeks, and the final result shows up over a month or two.Cleveland Clinic explains that the treatment is minimally invasive and works well for smaller spider veins on the face.
Is it safe for facial veins?
Facial sclerotherapy uses a finer needle and lower concentrations than the leg version, so the risk of bruising or pigment changes is tiny. Your practitioner will test a tiny spot first – if you don’t react, they’ll move on to the rest of the map you drew in Step 1.
But you might wonder, “Will it look natural?” Absolutely. The scar tissue is microscopic; it never leaves a visible mark. Most patients report a subtle, almost imperceptible improvement after each session.
Who’s a good candidate?
Anyone with visible, superficial spider veins that haven’t responded fully to laser or topical work. It’s especially helpful for veins that sit just under the skin, where laser energy can struggle to reach without overheating surrounding tissue. If you’re on blood thinners, have a recent clot, or need a particular vein for future surgery, you’ll need a quick consult first.
Step‑by‑step guide to your first sclerotherapy appointment
- Book a free assessment at Simcoe Cosmetic Clinic. Bring photos of the areas you want treated – visual reference makes the plan smoother.
- During the consult, the provider will map each vein, discuss the injectable solution (commonly sodium tetradecyl sulfate or polidocanol), and set realistic expectations.
- On treatment day, you’ll lie down, and the clinician will inject the solution into each targeted vein. You’ll feel a brief pinch, maybe a mild burning sensation, then it’s over in 30‑45 minutes.
- After the injections, stay reclined for about 15 minutes while the provider checks for any immediate reaction.
- Wear a light compression wrap for the next 3‑7 days. It’s not a tight bandage – just enough pressure to keep the treated vessels from leaking.
- Resume normal activities, but avoid hot tubs, saunas, or intense facial workouts for 48 hours.
- Schedule a follow‑up in 4‑6 weeks. Most people need 2‑3 sessions spaced a month apart for optimal fade.
Does that sound doable? Most patients say the recovery feels like “a gentle bruise that fades on its own.” Walking, gentle facial massage, and staying hydrated actually speed up the healing.
Expert tip: combine with a light laser boost
Many clinicians, including those at Simcoe, recommend pairing sclerotherapy with a single pulsed‑dye laser session after the first injection. The laser tightens surrounding skin, giving you a smoother canvas while the sclerotherapy works from the inside out. According to the American Academy of Dermatology, combining modalities can improve overall clearance rates for facial spider veins.
Ready to give it a try? Grab that consultation, ask about the injectable options, and remember: you’re not chasing a miracle overnight – you’re investing in a series of small, confident steps toward clearer skin.
Step 5: Lifestyle Changes and Prevention
You’ve just finished the sclerotherapy session, and now you’re wondering how to keep those veins from marching back. The good news? Most of the work you can do lives in your daily habits, not in another needle.
Spider veins affect more than half of women over 50, according to Cleveland Clinic. That tells us they’re common, but it also tells us they’re tied to factors we can influence – sun exposure, circulation, and overall vascular health.
Protect Your Skin From UV Damage
Sunlight is the silent culprit that weakens tiny capillaries. A broad‑spectrum SPF 30+ sunscreen applied every morning creates a protective shield. Re‑apply every two hours when you’re outdoors, and don’t forget the ears and neck. I once watched a client skip sunscreen on a beach day; a week later she noticed fresh red lines on her cheeks. A wide‑brim hat and UV‑blocking sunglasses are cheap insurance.
Keep Blood Flow Moving
Even a short walk after lunch can keep blood from pooling in facial veins. Gentle cardio – brisk walking, cycling, or a light jog – boosts circulation and encourages the body to remodel weakened vessels. If you sit at a desk all day, try a two‑minute “shake‑out” every hour: lift your shoulders, roll your neck, and smile. A high‑school teacher I know set a timer and now reports fewer new veins after a semester.
Hydration and Nutrition
Water is the ultimate vascular lubricant. Aim for at least eight glasses a day, and consider a glass with a squeeze of lemon for extra vitamin C, which supports collagen that holds vessels in place. Foods rich in flavonoids – berries, citrus, dark chocolate, and leafy greens – have been shown to strengthen capillary walls. One client swapped soda for berry smoothies and saw a subtle fade in existing veins over a month.
Gentle Skincare Habits
Hot tubs, saunas, and aggressive exfoliation can dilate blood vessels temporarily, making them more visible. Stick to lukewarm water for face washes, and use a soft konjac sponge instead of a rough brush. Light facial massage with upward strokes can actually improve lymphatic drainage, but keep the pressure light – you don’t want to pop the veins.
If you’re looking for a minimally‑invasive boost between appointments, some clinics offer radio‑frequency‑based VeinGogh therapy, which uses micro‑bursts of energy to coagulate tiny vessels. Athens Veins describes the procedure as quick, painless, and with virtually no downtime.
Check Your Meds and Hormones
Oral contraceptives and hormone replacement therapy can increase vein fragility. If you suspect a medication is a factor, schedule a chat with your provider. They might adjust the dose or suggest an alternative that’s easier on your skin’s micro‑circulation.
Actionable Checklist
- Apply SPF 30+ every morning, re‑apply after two hours outdoors.
- Take a 5‑minute walk or light cardio at least three times a week.
- Drink 2 L of water daily; add a vitamin C‑rich fruit.
- Eat a “rainbow” of flavonoid‑rich foods each day.
- Limit hot tub sessions to under 15 minutes and avoid sauna on treatment days.
- Ask your doctor about any hormone‑related meds that could exacerbate veins.
Remember, these tweaks aren’t magic bullets, but they create an environment where new spider veins struggle to form. If you combine them with the laser or sclerotherapy steps you’ve already tried, the results can feel like a lasting fresh start.
Ready to put the plan into action? Start with sunscreen tomorrow, and track your progress in a simple journal – you’ll be amazed at how quickly the skin begins to look smoother and calmer.
Step 6: Post‑Treatment Care and Recovery
Congrats, you’ve just walked out of Simcoe’s clinic with a fresh‑look face. The real magic, though, happens in the days after you leave the chair. Think of it like watering a new plant – the roots need the right conditions to grow strong, otherwise the buds you just pruned might pop back.
First 24‑48 hours: gentle protection
Right after sclerotherapy or laser, keep the treated area upright and avoid any heavy pressure. A light compression wrap (the kind the clinician gave you) is enough – you don’t need a tight bandage that feels like a tourniquet. If you notice a faint bruise, that’s normal; most patients describe it as a “soft raspberry.”
And here’s a pro tip: apply a fragrance‑free, silicone‑based gel twice a day. Silicone helps seal the micro‑injury and reduces discoloration. Cleveland Clinic notes that silicone gels can cut post‑procedure hyperpigmentation by up to 30 %.
Heat, sweat, and the “no‑fun” list
For the first 48 hours, skip the sauna, hot tub, and even hot yoga. Heat dilates blood vessels, which can undo the work you just did. If you love a post‑workout glow, opt for a cool‑down shower and a gentle facial rinse with lukewarm water.
What about makeup? Wait at least 12 hours before applying any foundation or powder. When you do, choose non‑comedogenic products and use a clean brush – you don’t want bacteria to sneak into the tiny puncture sites.
Nutrition and hydration boost
Water is still your best friend, but now add a splash of vitamin C‑rich juice (orange, kiwi, or pomegranate). Vitamin C supports collagen remodeling, which is exactly what your skin needs to seal those treated vessels. A handful of berries in the morning also gives you flavonoids that strengthen capillary walls.
And if you’re wondering about supplements, a daily 500 mg dose of vitamin C combined with 400 IU of vitamin E has been shown to improve skin healing rates, according to a review in the American Academy of Dermatology’s post‑procedure guide.
Movement matters
Light cardio – a brisk 10‑minute walk or gentle cycling – promotes circulation without stressing the face. I had a client who did a short walk after each treatment; she reported faster fading of bruises and a smoother texture after two weeks.
But avoid any vigorous facial gymnastics: no heavy facial massages, no “skin‑tightening” devices, and no aggressive exfoliation for at least a week.
When to call the clinic
If you notice swelling that doesn’t go down after 48 hours, a sudden surge of redness, or any pus‑like discharge, give Simcoe a call. Those signs could mean infection, and early intervention keeps the recovery on track.
Most of the time, the only thing you’ll see is a faint pink line that fades gradually. Trust the timeline: laser‑induced veins typically clear within 3‑4 weeks, while sclerotherapy can take 6‑8 weeks for full absorption.
Quick post‑treatment checklist
- Keep compression wrap on for 3‑7 days, then replace with a gentle moisturizer.
- Apply silicone gel morning and night for two weeks.
- Avoid heat, saunas, and hot tubs for 48 hours.
- Drink at least 2 L of water + vitamin C‑rich fruit each day.
- Take a 10‑minute walk daily, but skip intense facial workouts.
- Call the clinic if swelling, pain, or unusual discharge persists.
Bottom line: treat the days after your appointment like a mini‑recovery plan. Follow these steps, and you’ll give your skin the best chance to stay clear, smooth, and ready for the next step in your confidence journey.
Conclusion
So there you have it—getting rid of spider veins on your face isn’t a mystery, it’s a series of small, doable steps you can fit into everyday life.
First, you’ve learned why protecting your skin from UV, staying hydrated, and moving a little each day create a stronger vascular network that resists new lines.
Second, you know the post‑treatment checklist—compression, silicone gel, gentle skincare, and watching for any signs that need a quick call to the clinic.
Third, you’ve seen real‑world examples of patients who swapped soda for berry smoothies and saw those stubborn veins fade faster—tiny habits really add up.
Now, picture yourself three weeks from today, looking in the mirror and noticing a smoother, clearer complexion—you’ve earned that confidence boost by following the plan.
What’s the next move? Grab a journal, jot down your sunscreen routine, water intake, and any tiny changes you notice. Track it for a month and you’ll see patterns you can fine‑tune.
If you’re ready to take the next step, book a quick consultation with Simcoe Cosmetic Clinic—our team can tailor a treatment plan that fits your lifestyle and budget.
Remember, consistency beats perfection; a little effort each day keeps those spider veins at bay and lets your natural glow shine through.
FAQ
What actually causes spider veins on the face and can I prevent them?
Most of the time those tiny red lines are just weak capillaries that burst under pressure – think sun exposure, hormonal shifts, or even that daily latte you sip while scrolling. The good news? You can tip the odds in your favor. Wear SPF every morning, keep hydrated, and sprinkle flavono‑rich foods like berries into your diet. And if you notice a pattern, a quick chat with your clinician can pinpoint triggers you didn’t even realize.
How soon should I expect to see results after laser or sclerotherapy?
Honestly, it varies, but most folks spot a lighter appearance within 2‑3 weeks. Laser‑treated veins often fade like a bruise, gradually disappearing over 3‑4 weeks, while sclerotherapy can take a bit longer—usually 6‑8 weeks for the vessel to be fully absorbed. Patience is key; the skin needs time to remodel. If you’re eager, gentle massage and staying out of hot tubs can speed up circulation and help the process.
Are there any home remedies that actually work alongside professional treatments?
Sure thing. A daily splash of vitamin C‑rich juice (orange, kiwi, pomegranate) supports collagen that seals treated vessels. Adding a handful of berries gives you flavonoids that reinforce capillary walls. And don’t underestimate a simple habit: a 5‑minute “shake‑out” every hour at work—shoulders up, neck rolls, smile—keeps blood from pooling. These tweaks aren’t magic, but they create a friendly environment for your clinic work to shine.
Can certain medications or hormones make spider veins worse?
Yes, especially oral contraceptives, hormone replacement therapy, and even some blood thinners. They can make vessels more fragile, so new lines may pop up faster. If you suspect a med is a factor, schedule a quick consult with your doctor. They might adjust the dosage or suggest an alternative that’s gentler on your skin’s micro‑circulation. It’s a small change that can mean big differences.
What should I do if a treated vein reappears after a few weeks?
First, don’t panic. A little rebound is normal, especially if you’ve been catching extra sun or skipping sunscreen. Re‑apply SPF, keep the skin hydrated, and note any lifestyle changes that might have triggered it. If the vein stays stubborn after a month, reach out to Simcoe Cosmetic Clinic. They can assess whether a touch‑up laser session or a different sclerotherapy depth is needed.
How often should I schedule maintenance appointments at Simcoe Cosmetic Clinic?
Most clinicians recommend a check‑in every 3‑6 months once you’ve completed the initial series. That window lets you gauge how well your skin is holding up and gives the team a chance to fine‑tune your plan—maybe a lighter laser pass or a refresher sclerotherapy. Consistent follow‑ups are the secret sauce that keeps new veins from popping up and your confidence glowing.
Is it safe to use makeup right after a procedure?
Give the treated area at least 12‑hour breathing room before you reach for foundation. When you do, opt for non‑comedogenic formulas and apply with a clean brush—no dirty sponges that could introduce bacteria. A light, breathable concealer can cover any pinkness without stressing the skin. And remember, silicone gel stays your best friend for the first two weeks, so keep it on underneath the makeup.
